This guide looks at running your vSphere Client through SSH tunnels. You may need to do this due to having a Proxy in place or your firewall is blocking the required ports you need in order to run vSphere.
1. First of all edit your hosts file to include an entry for you ESX box. The file is located here C:\WINDOWS\system32\drivers\etc\hosts. And the entry should look something like this.
127.0.0.1 ESX4.HOMELAB
2. Next we need to set up the SSH tunnels.
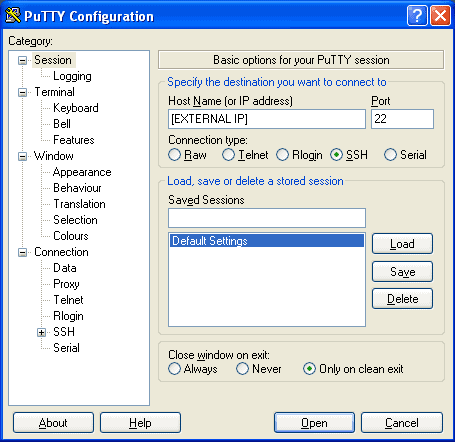
First of all add the external IP of your ESX device.
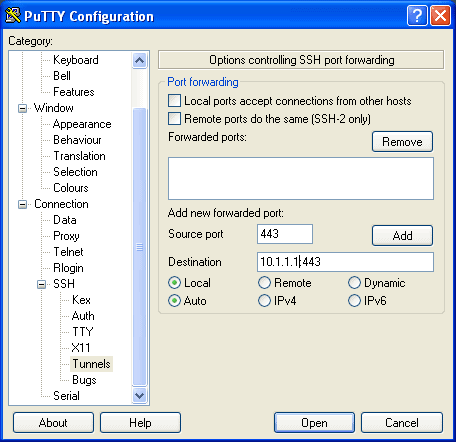
Now under “Connection > SSH > Tunnels” add The required ports that you need to forward. Below shows you the fields you will need to complete. We need to do this for port 443, 902, and 903. The 10.1.1.1 address will be the internal IP address of your ESX server.
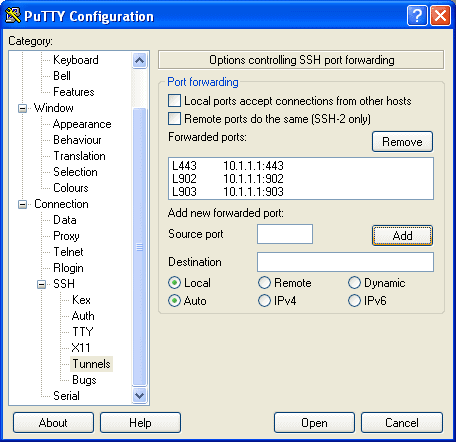
Once done it should look like this. In your case the 10.1.1.1 address will be that of your ESX servers internal IP address.
Go back to the screen where you added your external IP and then under “saved sessions” add a new name for this session and click save. This will ensure you do not have set all this up again every time you wish to connect.
Now click open and log into your ESX box via SSH.
3. Open your vSphere client and enter your username and password with the “IP Address / Name” being the name you entered into your host file. Your client will now connect to your ESX box using SSH tunnelling.

- NETCONF & YANG: Automate Network Configs via Python - April 2, 2026
- Palo Alto – How to Configure Your Next-Generation Firewall - April 2, 2026
- How to Harden Linux SSH: Keys, Fail2ban & Ciphers - March 1, 2026
Want to become a VMware expert ?
Here is our hand-picked selection of the best courses you can find online:
Complete VMware Administration course
VMware vSphere 8 – Install, Configure, Manage
and our recommended certification practice exams:
Delta Practice Tests