This guide will explain the various steps required to set up Enpoint Connect using a Multiple Entry Point setup. Ok, so to start with Endpoint Connect is Check Points new Remote Access VPN Client other then SSL Network Extender is the only client supported on Windows 7 64-Bit. The main problem with SNX (SSL Network Extender) is that it doesn’t allow for MEP setups.
Table of Contents
What is MEP (Multiple Entry Point) ?
This allows for your client to access your VPN domain via an alternative gateway if it is unable to establish a VPN tunnel using your primary gateway. This can allow redundancy in scenarios such as gateway outages, ISP problems or even just general internet routing issues.
What does this Tutorial Include ?
This tutorial will include the following sections :
- Upgrading your Gateway to the latest Endpoint Connect Version
- Configuring Endpoint Connect
- Enabling and Configuring the Endpoint Connect MEP New Mode feature.
- Licensing
Upgrading your Gateway to the latest Endpoint Connect Version
Please note : this tutorial is based on upgrading the gateway to version 835000022.
In order to ensure that your gateway has the latest Endpoint Connect files you will need to :
- Confirm the Endpoint Connect Version you are running on your client
- Confirm the Endpoint Connect Version you are running on your gateway by running
cat $FWDIR/conf/extender/CSHELL/trac_ver.txt
If your gateway has an older version you will need to :
- Download the .cab file from the Check Point site for your latest version of Endpoint Connect. In this example the file we need to download is Check_Point_Endpoint_Connect_R73_For_Windows_835000022.cab.
- Run the following commands on your gateway. These commands also backs up your old files using their previous files names with an added .bak.
cd $FWDIR/conf/extender/CSHELL
cp TRAC.cab TRAC.cab.bak
cp trac_ver.txt trac_ver.txt.bak
mv -f /var/tmp/Check_Point_Endpoint_Connect_R73_For_Windows_835000022.cab TRAC.cab
chmod 750 TRAC.cab
echo 835000022 > trac_ver.txt
Topology Example
Configuring Endpoint Connect
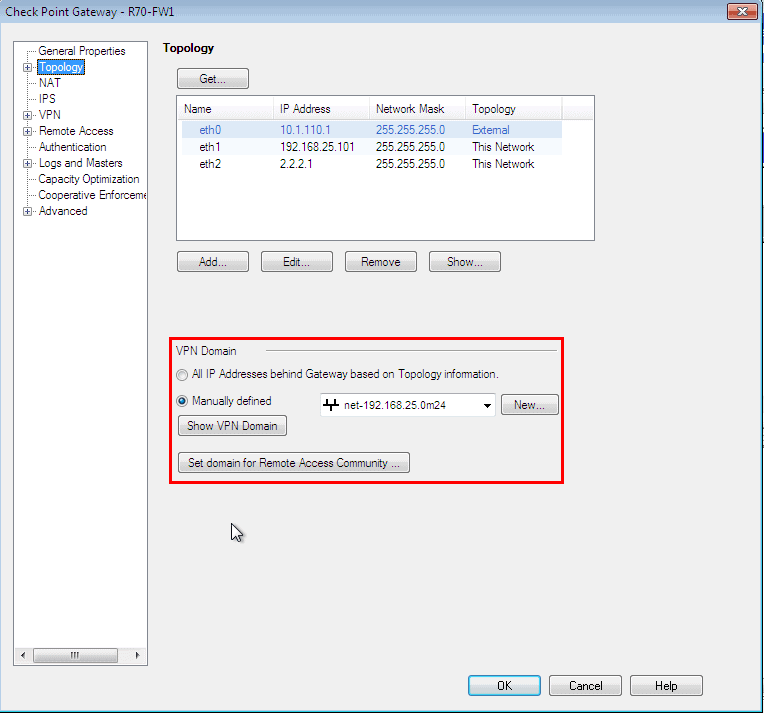
1. Add your encryption domain to your gateway.
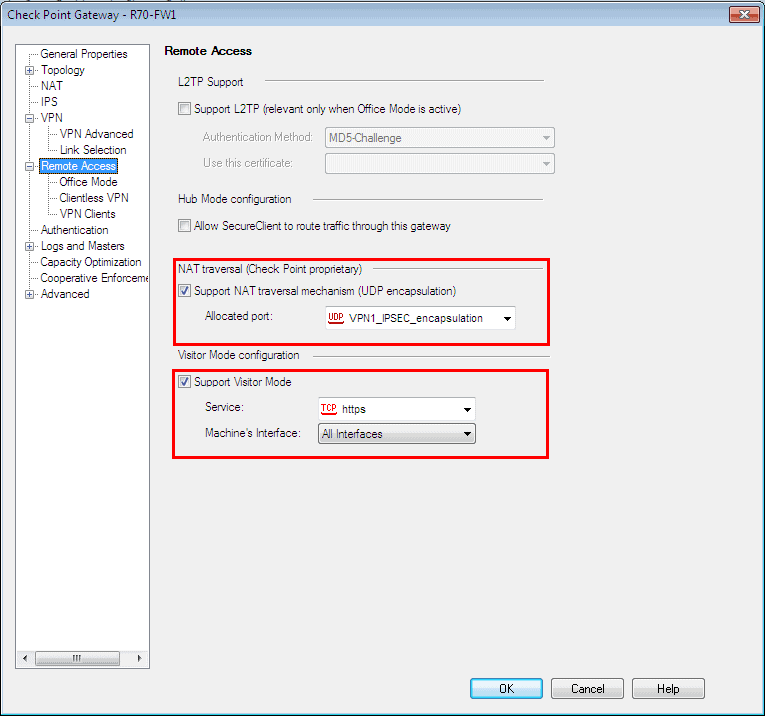
2. Enable NAT-T and Visitor Mode.
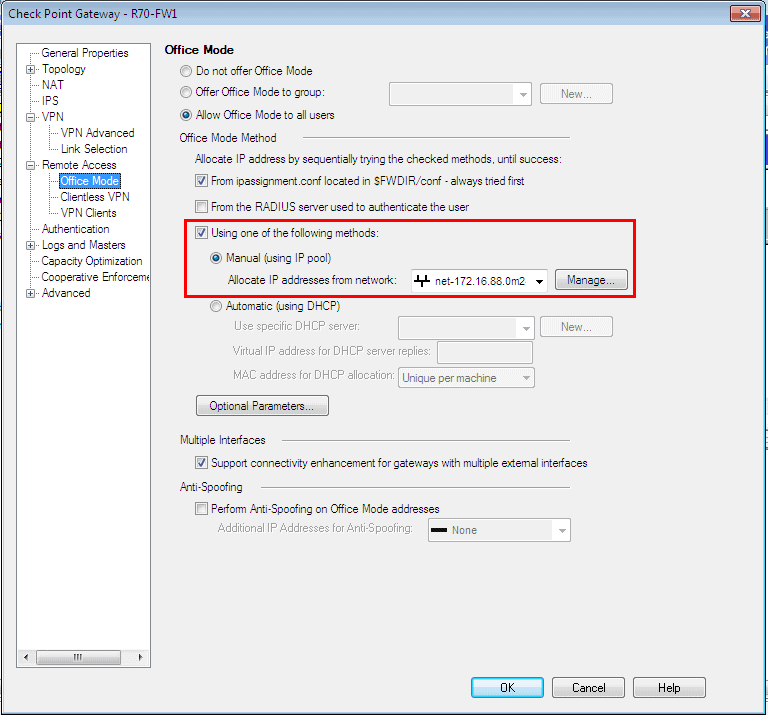
3. Enable Office Mode.
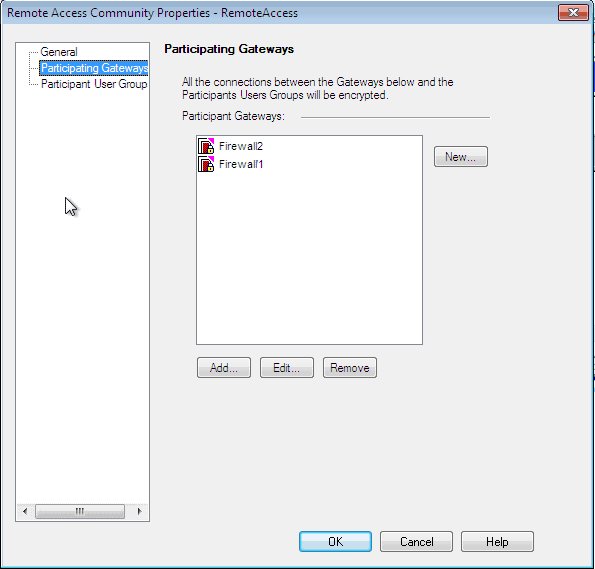
4. Add both gateways to your Remote Access Community.
5. Create your Security Rule.

Enabling and Configuring the Endpoint Connect MEP New Mode feature
To enable MEP New mode you will need to edit the file $FWDIR/conf/trac_client_1.ttm. Under the section :ips_of_gws_in_mep you will need to add the IP addresses of the gateways that will act as the various Entry Points.
Change :
:enable_gw_resolving (
                         :gateway (
                                 :default (true)
                         )
                 )
To this :
enable_gw_resolving ( :gateway ( :default (true) ) ) :mep_mode ( :gateway ( :default (first_to_respond) ) ) :ips_of_gws_in_mep ( :gateway ( :default (1.1.1.1.2.2.2&#) ) )
Push Policy
Once all the above steps have been completed push the policy to the gateway.
Licensing
Licensing principle: VPN clients (SecureClient, Endpoint Connect, Secure Access, SNX) require a Secure Access license to be enabled.
Secure Access is licensed per seat, so VPN clients (SecureClient, Endpoint Connect, Secure Access, SNX) for VPN-1 are also licensed per seat, meaning that if two users connect from the same computer, it will count as one license.

- NETCONF & YANG: Automate Network Configs via Python - April 2, 2026
- Palo Alto – How to Configure Your Next-Generation Firewall - April 2, 2026
- How to Harden Linux SSH: Keys, Fail2ban & Ciphers - March 1, 2026
Want to become an IT Security expert ?
Here is our hand-picked selection of the best courses you can find online:
Internet Security Deep Dive course
Complete Cyber Security Course – Hackers Exposed
CompTIA Security+ (SY0-601) Certification Complete course
and our recommended certification practice exams:
Delta Practice Tests